If you collect older games, sooner or later you’re going to run into burned out connector pins. Sometimes it’s just from a bad loom or dirty contacts, other times it’s due to people soldering adapters to boards – one of the ultimate tech sins.
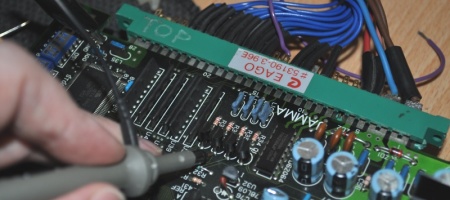
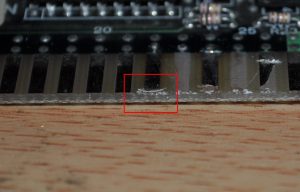
I picked up a Sauro PCB on ebay, it was booting very unreliably – I haven’t built a proper loom to re-test it with yet, but the horrible old soldered loom was causing a 0.3v drop – by the time the voltage got anywhere near the logic chips it was 4.79v. I decided the soldered on loom would have to go, so I desoldered it and found two instances of this:
The damage appeared to have been done before the soldered loom was fitted, and burning out contacts is exactly what happens when you only partially wire up a connector, which is why it’s important when looming cabs and building adapters to make sure they’re wired fully. By all means run one thick wire for some groups of pins, but make sure they’re tied together. The reason this happens is simple – the amount of contact surface on a single pin isn’t actually that much. If you pull a lot of current it will start to heat up, over time this gets worse as the heat makes the contact quality even worse, it starts acting like a resistor. Eventually, they burn out. Wiring them up fully spreads that load.
This is pretty much one of the more horrible physical repairs you tend to need to do, you can buy adhesive copper track, but I’ve tried it and it’s next to useless. When you have a pinout that allows it, making a wraparound pin from a copper strip which is attached on the parts and solder side is the strongest method of repair, but sometimes as with this Sauro board, parts side is GND and solder side is +5, so we can’t use that method.
What we can do though, is use a donor board and reclaim contacts from there. First thing to do is cover the contact you plan to use with solder. This will do two things – firstly later on you won’t need as much heat when fitting the new contact, and secondly a brief cooking will weaken the glue holding the contact to the donor board:
When you’ve done that and sucked the solder back off, the next thing to do is use a craft knife and cut into the PCB surface just beneath the track, so you can start to lift it.
Lift it up a bit and then use some pliers to just pull the track up. Turn it over and scrape the old adhesive away from the copper side.
Next, cut it to size as close as you can (too short and you’re starting over again, so be generous if need be), and superglue it in place on the board being repaired.
Now comes the difficult bit. It may look good but you have no continuity at the moment, nothing reliable anyway. The contact needs soldering to what’s left of the original, but this will instantly break down the superglue, and you’ll find the new contact sticking to and coming away with the soldering iron. So, clamp it in place with something and then put a solder blob linking the old and new. I use pliers and a rubber band.
When that’s cooled down, remove the pliers and it should stay in place – but the superglue has been destroyed at this point, so lift the contact up slightly – be gentle as it’s now held to the board by the solder join to the old contact, a small surface area.
Then simply glue it back down, use something small (my bench is generally covered with capacitor legs which are perfect) to shove some glue further down.
Finally when that’s set, clean the contact up with a fibreglass pen. I actually cleaned them all at this point which is something you should do after removing soldered looms anyway.
I didn’t actually rub through to the copper in that photo, it was taken in a different room and picked up the lights! Anyway, that’s fixed now and we’re all good to make a proper adapter for the game!


