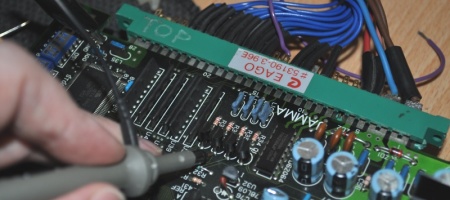
I have recently been renovating and upgrading the Amiga 2000 which I have owned for over a decade, but for most of that time spent its life as a monitor stand after I accidentally formatted the hard drive….
The Amiga 2000 is a “big box” machine, somewhat like an old desktop PC with a much larger than usual motherboard and an array of expansion slots. What it also has is enough space to hold two 3 1/2 inch drive units and an additional 5 1/4 inch one (often used for a CD-ROM). Back in the day having an external (or second) drive was almost essential to avoid constant disk swapping, but these days WHDLoad has negated most of the need for them. A useful set up though is still to have a floppy drive emulator unit such as a Gotek which loads images from USB drive or SD card, and a real drive in case you need it. Later versions of the firmware can boot standard floppies from either drive, but earlier ones (1.3 is considered to be the most compatible with the golden age of Amiga gaming) can’t and disks with custom bootloaders will tend to fail.
This takes us to a place where it’s useful to have the ability to swap which order the machine sees the drives so that either can be used for booting even with the oldest versions of the firmware. While these products do exist I found that they were all either out of stock or generally aimed at the common Amiga models which don’t use a double ended ribbon cable with a twist across pins 4 and 6 for drive LED activation. Additionally it seemed that anyone making projects for the Amiga do so very much with an eye on retaining control and making money. This may simply be a misconception on my part because I didn’t know where to look, but it seemed like something I should design and make myself. So I did.
I designed two versions which are both intended to fit to the side of the drive cage by swapping two screws for longer ones, the larger one was the first design and this is arranged so that cables come around the back of the cage, but for people who don’t mind using their 5 1/4 inch bay as a cable tidy I also designed the much more compact version, which may be a better fit if a longer card is in the video slot as you’ll see in photos below. It’s a very simple circuit which flips the drive select lines and the LED lines if jumper JP1 is shorted or grounded. Since it’s being electrically switched there’s absolutely no problem switching these without turning the machine power off which I’ve seen recommended for other solutions. Interestingly while I expected this to cause Workbench significant confusion, if there’s only a disk in one of the drives it will actually work things out itself but it’s probably best to switch them when no disks are in at all. Two power connectors are provided purely for convenience in case power splitting is required.
Here’s the assembled product, this is how you install them:
I use the smaller type myself, I kept one of each and assembled and sold the rest of the boards (had to be ordered in minimum amounts of three). I’m not intending to make any more personally.
First the PCB – I would strongly recommend purchasing them from OSH Park who sell and ship custom circuit boards at extremely affordable rates compared to other options, and they come in that awesome purple colour. You can go to their site and simply order these from the following two links:
If you need to use an alternative or have your own board making tools here are the design files in EAGLE board format:
Parts required:
2x 34 pin IDC connector (remove pin 3)
1x 4.7k ohm resistor 1/2 watt
1x 2 pin right angle pin header
1x 16 pin DIL socket (optional)
1x 74F157 multiplexer
2x 4 pin floppy drive connectors (2.5mm TE Connectivity EL series)
1x 34 pin IDC ribbon cable approx 70cm long
2x nylon 4-5mm spacers
2x 10mm M3 screws + washers
2x fibre or plastic insulating washers
The 34 pin cable is for connecting between the Amiga motherboard and the switcher, please note that some cables sold on ebay as PC floppy cables will NOT work as they have a PC pinout twist in the cable. It’s easy to see except for the braided sheath types so avoid those entirely. Several sellers make custom cables cheaply, or you could use an actual dual ended PC one if you chop the twisted section off. As for a switch there are many options from moving a jumper manually to electrically controlling via a pulldown. Most people will probably just use a simple toggle switch and some wires.
That’s all there is to it really, I’d appreciate it if anyone who decides to make these to sell only charges a nominal amount for their time, it wouldn’t be within the spirit of the project to turn it into a profit enterprise. I’d also appreciate you leaving the blog URL on the silkscreen, I was in two minds about making the raw board files available after seeing how mercenary some of the Amiga scene is.


