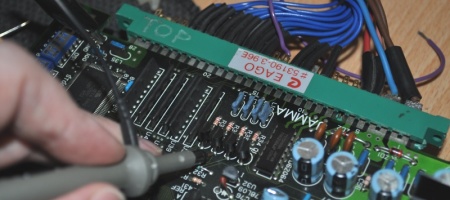
I bought an Atomic Robo-Kid PCB a long time ago, in fact my e-mail doesn’t even go back far enough to find out when it was. Just one problem, it was always unreliable and over the years as I’ve learned more about repairing games I’ve come back and taken a look at it, and again drawn a blank. At one point in desperation I even reflowed the RAM but no luck. Same problem every time, it would refuse to boot and after a while it would start to work perfectly, but freeze spray yielded no results regardless of where I tried. Recently I picked up another and tried something I hadn’t really thought of before – swapped the CPUs over. Instantly the PCB was fixed. It turns out that the old CPU has some kind of thermal related issue, but freeze spray had never exposed this. Normally this would be a one line entry in the repair log and I’d move along, but there’s a slight problem….. It’s a custom encrypted CPU block.
So let’s have a look inside. What we actually have is a tiny PCB with a Z80 mounted on the top side, and a small PROM chip on the bottom side. The block thankfully doesn’t contain a battery, but it does mean we can’t just drop a normal Z80 in – it scrambles some of the address lines depending on which area of memory is being used. Then the whole assembly is placed in a metal box and filled with epoxy compound, the reason freeze spray was having no effect.
Fortunately this game was bootlegged, and the bootleggers managed to pull one of these apart (or since it’s a direct clone maybe they had access to the details to begin with), and as a result Stefan Lindberg managed to dump the PROM image from one and also trace out the circuit board. Testing with the bootleg module in a real PCB proved that the data was indeed correct for both.
The CPU is a Sharp LH0080E Z80-E CPU which is rated for 8mhz, and the PROM is a 82S129. All that remained was to make a replacement CPU module following the above diagram. Well, it was a mess and very temporary, but I ended up with this extremely ugly creation. Fortunately you can’t see the worst parts of the project board hack…
I actually got it wrong the first time around, one of the pairs of PROM outputs was flipped. Ten minutes later with a corrected module, and the game was running perfectly.
The trouble is, while the game was working fine, that solution is incredibly ugly. For a moment, I considered making a tidier hack with the PROM hot glued to the CPU, but I didn’t really ever want to have to do this again, so it was time to do the work properly. I designed a module PCB in PCB Express, but honestly I wasn’t feeling too happy about the costs. That was when Charles MacDonald told me about OSH Park (http://oshpark.com) who specialise in small run project PCBs. Only problem was they require Eagle CAD files, and I didn’t know Eagle at all. No time like the present I suppose…
With that done I uploaded the file to OSH Park and waited until today, and here are the results for a very reasonable price of around $14 posted to the UK!
Let’s stick all that together properly now and fit it to the PCB, there – much better!
Of course, there’s no point documenting this and doing the work without making the fix easily available. I’ve got a couple of spare boards if anyone needs one, but you could just make your own. Here’s the Eagle file and the 82S129 PROM image you’ll need to construct one:
Fantastic game. Underrated. The Robo-Kid approves of this repair.


