A bit of a sad story this one, one without a complete ending in fact. A few weeks ago I bought an Undercover Cops PCB + art from a French PCB shop called ‘Video Game Addict’ (www.video-game-addict.com, don’t buy from there). It’s run by a guy called Cyril Bertolo who claims to be a professional PCB seller. The photos such as they were looked OK, it was sold as fully working, but the price was incredibly high. After thinking about it a week or two, I decided to buy it anyway since the artwork had matching serial numbers to the PCB.
Then it arrived. Straight away it was obvious that this purchase was not going to end well..
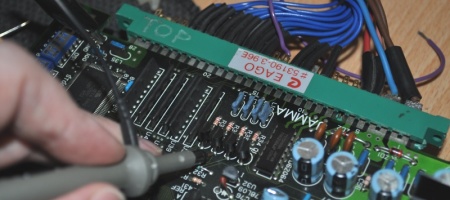
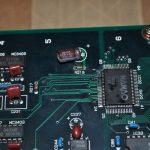
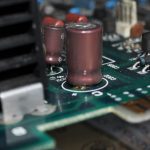
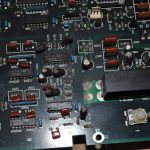
It had suffered a pretty bad case of capacitor leakage. I counted at least 4 or 5 which had definitely leaked, many components were corroded, including tracks on the surface mount audio chip, most of the resistors, the legs of the amp and so on. The larger cap near the amp was still actively leaking and came with a free pool of brown goop underneath. Those are some of the more flattering photos, many of the resistors had dry solder/corrosion mountains erupting and cracking beneath them. Nice.
Straight away and without bothering to switch it on, I contacted the seller to point out that for 550 euros (yes, really), I kind of expected a board without serious corrosion and capacitor leakage issues. I asked for a partial or full refund since this dramatically affects the material value. He brushed the complaint off and suggested I wash it and test to see it it worked:
so, i verified my announce on my webshop, and it’s not written anywhere that the PCB is new, or like new. Please read the description correctly.
Secondly, in the announce of the PCB, you have normally find 3 pictures in High Quality where you see the PCB. So, it’s not my foul if the corrosion is here, on pictures it was already the case.
Finally, you have not asked any questions about the PCB to know the state, if it’s in good condition or not.
For your information, the PCB have nearly 20 years, so i little bit of corrosion is normal.If you requiring a perfect quality of a PCB, you must ask more information or pictures at the seller, it will be with pleasure i will send you that.
So, you will understand that the refund is impossible cause there is no mistake in my sales.
Description product has been correct with pictures.
I didn’t ask that it look like new, I asked that it be in good condition, and certainly not actually faulty and gushing capacitor acid all over the other components. Nevertheless, I did test it as he had requested, after some safety checks. The sound was fucked, as it was obviously going to be – weak and crackly just to start with. I didn’t test it for long because quite honestly plugging it in, in that condition, was fucking stupid.
I told him about the sound problem, he said he’d get back to me next day, and didn’t. He did reply *very* quickly when I raised the Paypal dispute though…
thank you for your paypal dispute, really sympatic!
So, as I explained to you, a refund is impossible because I do not make any mistakes in my sales. With the arcade PCB, i take my precautions, because it’s a fragile system, so the packages is really strong to avoid shocks during transport, and all games are tested befor the shipment. Your game run perfectly.
You are trying to negotiate after the sale, it’s just impossible and not correct! it’s to easy, you buy something and you negotiate the price.
So, exceptionally, and to close the dispute, i’m agree to refund you 50€, cause the PCB is not in perfect state (but i tell again that my announce has correct, with no mistake. If you need more pictures, you must ask more picutres, so it’s your foul). On my pictures of the announce, the corrosion has ever present, so the customer must ask more informations if he wants.
If you are not OK, i will transfer all your private messages to show my good and no mistake sales and there will be no other negociate between us.
The game worked perfectly before sales, i sell lots of PCB games, i’m professional, and it’s the first time i have a problem like this with a customer. The game is not in perfect condition because the game have 20 years!!
Please do not buy anything in my shop for the future. You’re trying to negociate the price after sale and it’s not really legal.
Are you kidding me? So, it arrives physically and obviously faulty, and tested as faulty, and he’s still not willing to admit any liability or wrongdoing. In over a decade of arcade collecting, this is the second worst deal I’ve experienced. It’s actually worse than people who simply never posted things. So I weighed up the options, and decided to fix it and then pursue repair costs through Paypal, because at this point to be honest, making damn sure people know his business ethics became a lot more important than the money.
You’re going to need a PCB cleaning solvent (the good ones will clear off acid spills), or alternatively a pure alcohol and vinegar mix will work. You’re going to need a serious desoldering station or iron & sucker because corroded solder is difficult to get out of the PCB, and you’re going to need replacements for any seriously corroded components. You will need some thin multicore wire, a craft knife and a meter with a continuity test function. Finally you’ll need something to scrape with, and/or a fibreglass pen. You may like to play the A-Team music while doing this, it might make you feel less miserable but it didn’t work for me.
First thing to do is get those leaking capacitors off the board – there’s no point doing anything until they’re gone. Pull them off, do not try to desolder them because they’ll quite often start spewing out even more acid, sometimes violently. Next is to remove all the seriously affected components and scrape/rub down all affected pins, legs and tracks for components you aren’t removing. Remove ALL the capacitors of the same make as the leaking ones if you have several – there is a high chance these will also leak in future. This is actually a pretty tough job because of the heat required to clean out the solder holes. Many of the resistors simply broke away leaving the legs in the PCB due to the corrosion on this one. Unless your iron can hit the 400+ degree mark you’re going to really struggle – for some I had to use the iron on one side of a hole, and a desolder iron on the other. Do it for too long and you will ruin the PCB, so don’t try that trick unless you’re left with no other choice. You can throw the wick away too, never going to work. You don’t have to remove *all* the corroded components, if there’s just a little on the surface, and the component still checks out (for example some of the resistors I left in), they’re not going to get any worse once the acid is gone so you can leave them in.
When you’ve done that, and my sympathies for anyone who has to achieve it, clean the entire area really well (top and bottom) with your chosen acid removal solution, and then it won’t hurt at that point to give it a bit of hot water and detergent (note – avoid this if the PCB is generally corroded from moisture). You’ll end up with something that looks a bit like this:
Now, what I forgot to do was take a photo of the cleaned up custom chip. This turned out to be the worst possible case scenario, 9 or so tracks were nearly or entirely eaten – another source of the audio problems since this is actually where much of the audio comes from. After cleaning away the corrosion, I found most of the corroded tracks were totally eaten away between the leg and green solder mask. First thing to do is check all the legs which go under the chip – actually tricky, and it’s guesswork – look for holes which sit under the PCB. Only a couple of legs do that on this side of the M92 sound chip, I found one was grounded and the other did go to an intact track – if this hadn’t been the case I probably would have just written the PCB off and looked for a new motherboard.
To fix the broken tracks you need to scrape away some of the green solder mask and tin some of the exposed track with solder. These are small pins, you’ll need a steady hand, a pointed iron tip and some thin solder. Next you have to tin the chip legs, same thing – can be tricky due to the previous corrosion so make sure it’s really polished up with a fibreglass pen. An old trick to rejoin legs and tracks is to try to get the solder to bridge the gap. Don’t even bother. The gap is too wide, the surfaces each side too small, you’ll just mess it up. What you need is to build a bridge between them. Take some thin multicore wire, strip about 1cm from the end, separate 3 strands and twist them together. Leave a few inches of flex covered wire to hold it with. Tin these strands with solder. Now comes the fun part – you need to hold the wire in place against the chip leg, and melt the two together while keeping the wire very still. When that’s done, use a small flat ended screwdriver or similar to hold the wire closer to the flex down against the tinned track – melt the solder. If you get this right you’ll have replaced the track functionally, it’ll look like shit though. This is the best you’re going to get. Use a craft knife or razorblade to chop the flex covered part of the wire away – and repeat the procedure for the other legs. Check with your meter to ensure that the legs are connected to their track endpoints, and that they’re not shorted out.
When you’ve done this, and well done if you succeed, it’s a nice idea to cover the area back up with solder mask touchup, especially if there’s still exposed copper. As a bonus this will make the repair slightly more robust. It’ll come out something like this, hopefully:
As for the rest – it’s a case of putting all the new components back in – unfortunately you won’t be able to get the top-flowed look it had from the factory, because the corrosion destroys the top layer of plating on the through holes, and damages the metal itself. You might get lucky with a couple, but the ones which were really crusty and breaking up will just have to look a little untidy. Here’s the finished sound section:
So there you go, that’s how to fix this kind of problem up. I’ve heard of it happening with M92 games before, both times it was brown capacitor variants – check them regularly, looks like they were cheap and nasty. I’m not aware of any using the green make which have suffered a similar fate. Yet.


